3D Mesh Compare
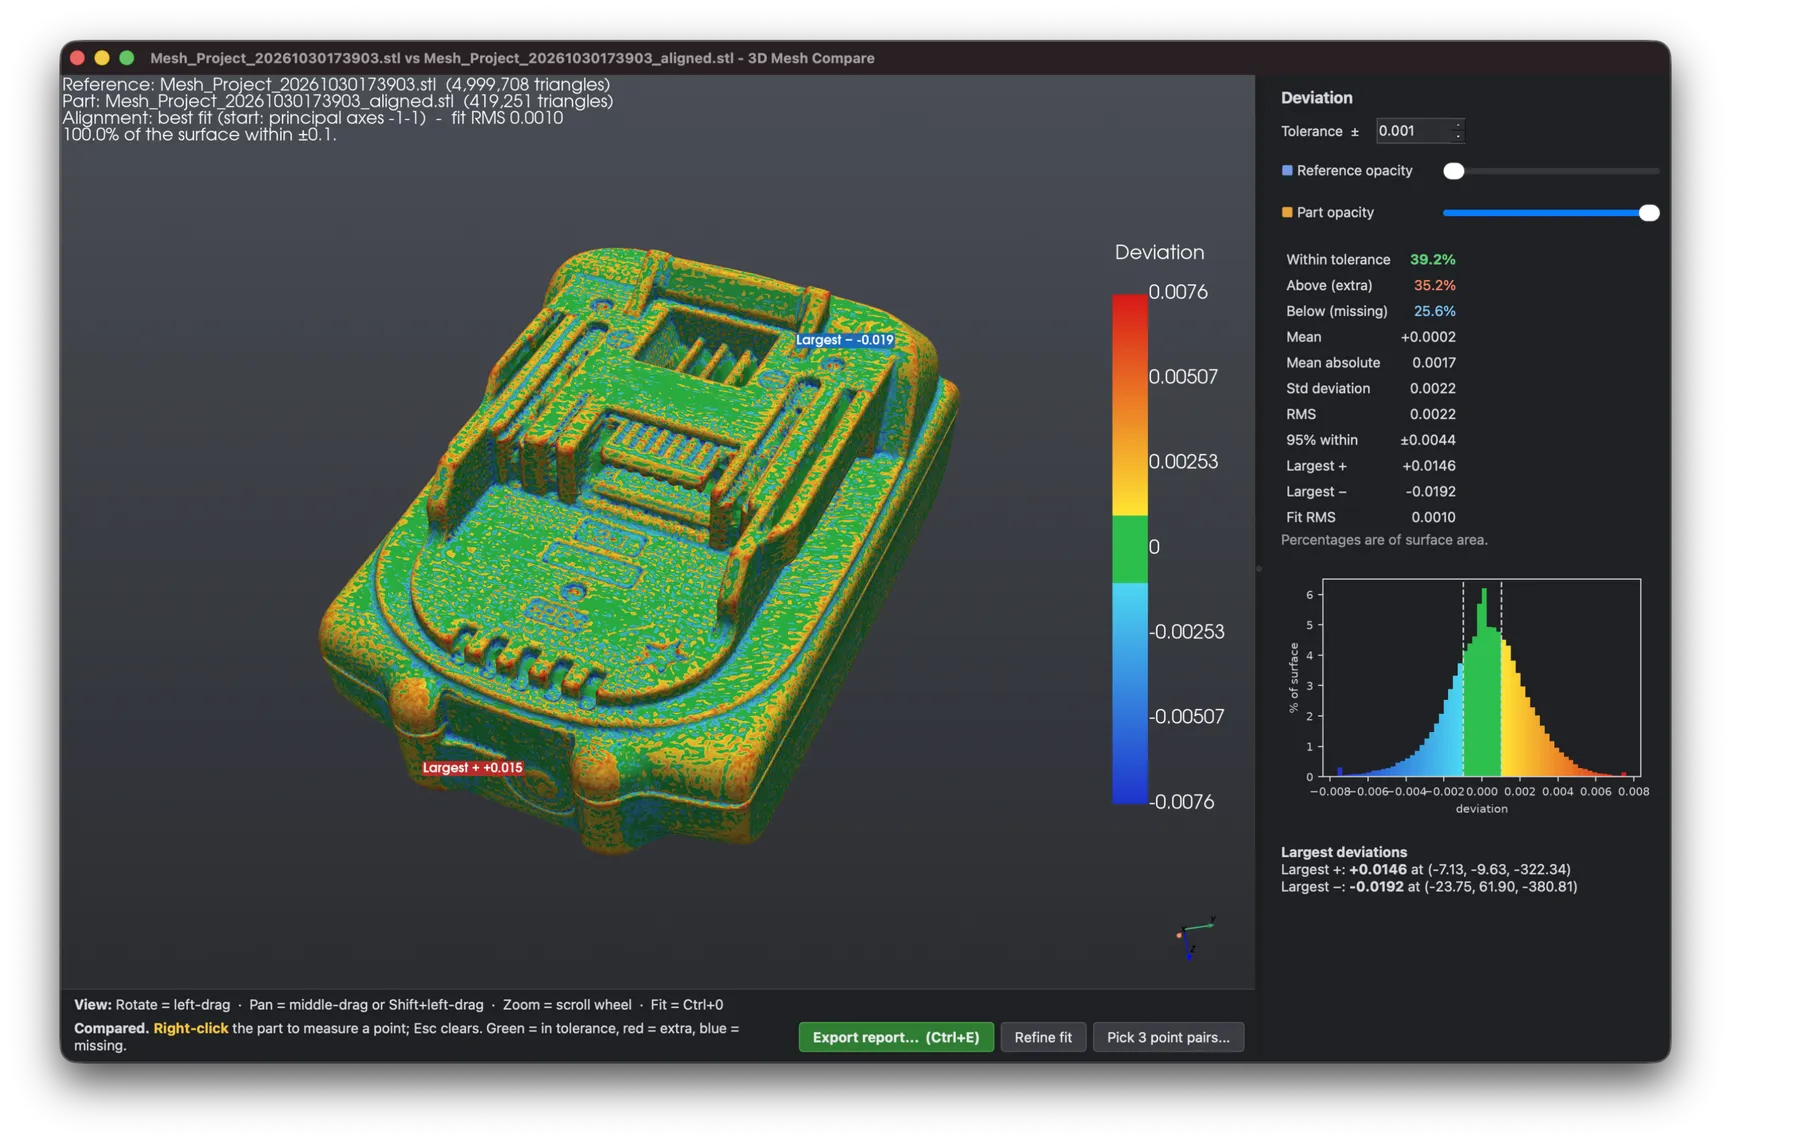
3D Mesh Compare answers the question every scan job ends with: how close is this part to the design? Load the reference — the design exported from CAD as an STL, or another scan — and the scan, line them up, and every point of the scan is coloured by its distance from the reference surface.
Download (zip) · Install guide · 3D Mesh Tools →
Current version: 2.2.0 · Windows, macOS and Linux · requires Python 3.10 or newer
What it does
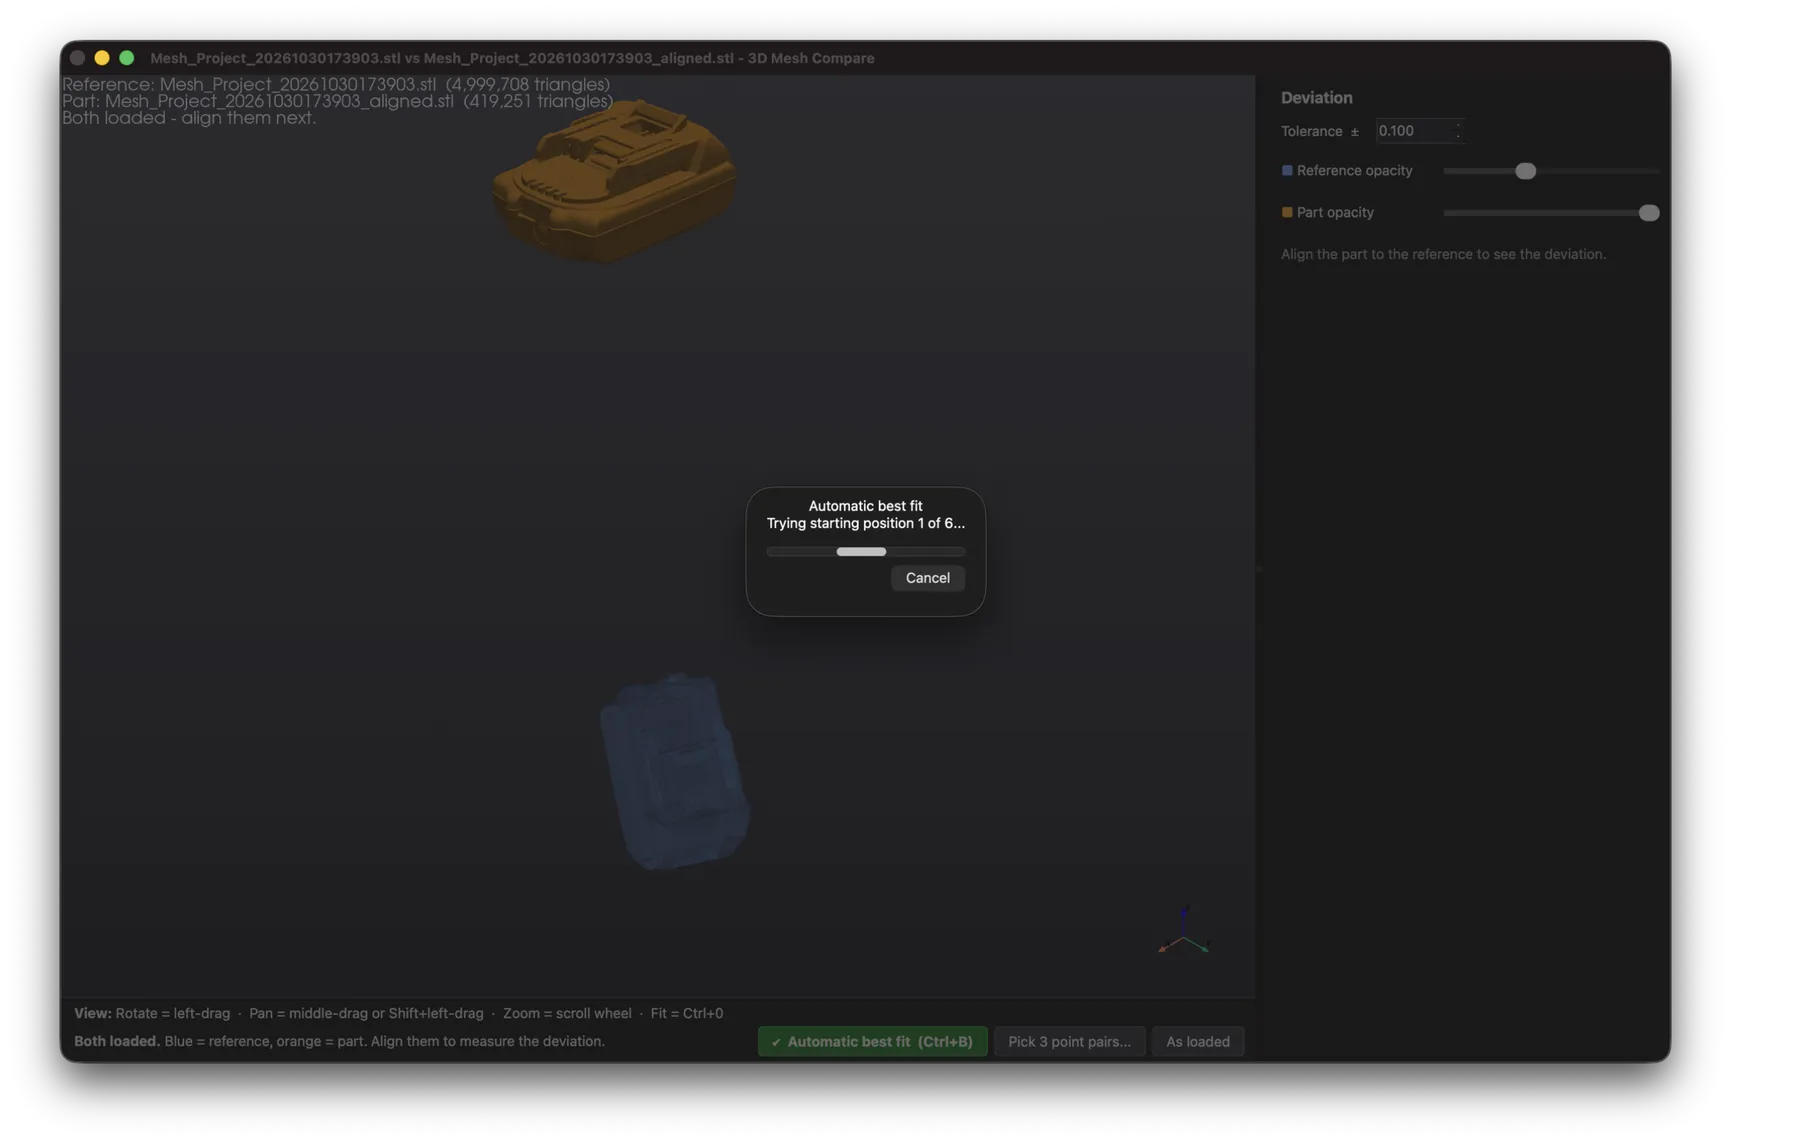
- Two colours to start. The reference is shown in blue and the part in orange, so you can see how far apart they start.
- Automatic best fit. One click lines the part up with the reference, trying several starting orientations and keeping the one where everything matches — so a nearly symmetric part doesn't end up upside down. The worst-fitting 10% of points (missing scan areas, fixtures, flash) are ignored so they can't pull the alignment around.
- Three point pairs. For awkward or symmetric parts, right-click three points on the reference and the same three on the part; a best fit then refines it.
- Tolerance colour map. Green within your tolerance, yellow-to-red for extra material, cyan-to-blue for missing material. Type a tolerance and colour range, or drag their sliders and watch the colours and figures update as you go.
- Read it with the mouse. Hover over the part and a label follows the pointer with the deviation at that exact spot and its X, Y, Z position.
- Pick out a range. Click the histogram to show only the areas below, within or above tolerance, or drag across it to show a range such as +0.1 to +0.3. Everything else turns grey, so you can see exactly where the problem areas are.
- Section view. Cut across X, Y or Z, or through three points you pick, and drag the cut through the part. A panel shows the reference outline and the part's outline coloured by deviation, with magnified "needles" showing the gap, and the largest + and − on that section labelled. Hover over the outline to read it, zoom in on detail, and tick Cut away the 3D view to see the cut on the model.
- Statistics by surface area. Percentage within tolerance, above and below, mean, standard deviation, RMS, the 95% band and the extremes, plus a histogram. Figures are weighted by surface area, so a densely triangulated corner doesn't count more than a big flat face.
- See-through parts. Sliders set how transparent the reference and the part are, so you can see one inside the other.
- Point callouts. Right-click anywhere on the part to pin the deviation at that spot. The largest + and − deviations are labelled automatically (you can turn that off).
- Branded HTML report. One self-contained file with your logo and company details, the job number, customer, part and inspector, the statistics, the histogram, the largest deviations and coloured views from three directions and any sections you've added — ready to email or print. Set your branding once under File › Report branding. See a demo report.
- Save the aligned part (with its 4×4 matrix) or every point's deviation as CSV.
- Big scans are fine. The work runs in the background across all your CPU cores; the window stays responsive and Cancel always works.
| Action | How |
|---|---|
| Open reference / part | Ctrl+1 / Ctrl+2 |
| Automatic best fit | Ctrl+B |
| Pick 3 point pairs | Ctrl+P |
| Refine the fit | Ctrl+F |
| Tolerance | Ctrl+T |
| Measure a point | Right-click on the part |
| Read the deviation | Hover over the part |
| Show one range | Click or drag across the histogram |
| Section view | Ctrl+K |
| Clear points / show all | Esc |
| Export HTML report | Ctrl+E |
| Open a file | Drag it onto the window |
Installing
Install it first — installation guide. Both programs come in the same download.
Running it
In a terminal, change to the unzipped folder and run:
python 3dmeshcompare.py
A window opens. Open the reference and the part with Ctrl+1 and Ctrl+2, or drag both files onto the window at once and pick which is the reference. To run it without the window, see below.
Command-line use
It also runs from the command line, e.g. to check a batch of parts:
python 3dmeshcompare.py bracket.stl bracket_scan.stl --tol 0.1 --report bracket_report.html
Add --save-aligned to save the aligned scan, --csv deviations.csv for every point's deviation, or --align asis if the files already share coordinates. Report details can be given too: --job, --customer, --part, --operator, --notes, --title, --company, --contact "phone|email", --logo logo.png, --section Z=6 (repeat for more sections), and --no-extremes to leave out the largest-deviation labels.
Troubleshooting
The window flashes open and closes immediately. Run it from a terminal instead of double-clicking, so you can read the error. In most cases a library is missing.
"No module named numpy" (or pyvista, pyvistaqt, qtpy).
The libraries were installed for a different copy of Python. Run the install command using the same python you use to start the program:
python -m pip install numpy scipy pyvista pyvistaqt pyside6
"Can't find the 'meshtools3d' folder".
3dmeshtools.py and 3dmeshcompare.py both need the meshtools3d folder from the zip next to them. Unzip the whole download rather than copying out just the one file.
On Linux: "Could not load the Qt platform plugin xcb".
Install the missing system library, e.g. on Ubuntu/Debian: sudo apt install libxcb-cursor0.
The automatic best fit lines the part up the wrong way round. That can happen with very symmetric parts. Use Align › Pick 3 point pairs and choose three spread-out points that tell the orientation apart (a hole, a boss, a chamfered corner).
Download
Download the zip — contains both programs. See the installation guide, or browse the source on GitHub.